Author

Ankit Kumar

Browsing

Hey! Are you looking for how to send email in PHP using PHPMailer and add attachments to your messages? In this comprehensive guide, we’ll walk you through the steps to send emails seamlessly within your PHP applications while incorporating attachments for enhanced communication.

Whether you’re building an email contact form, or automating email notifications, this tutorial will provide you with the knowledge and skills you need. Let’s dive in and unlock the potential of PHPMailer for your email needs!

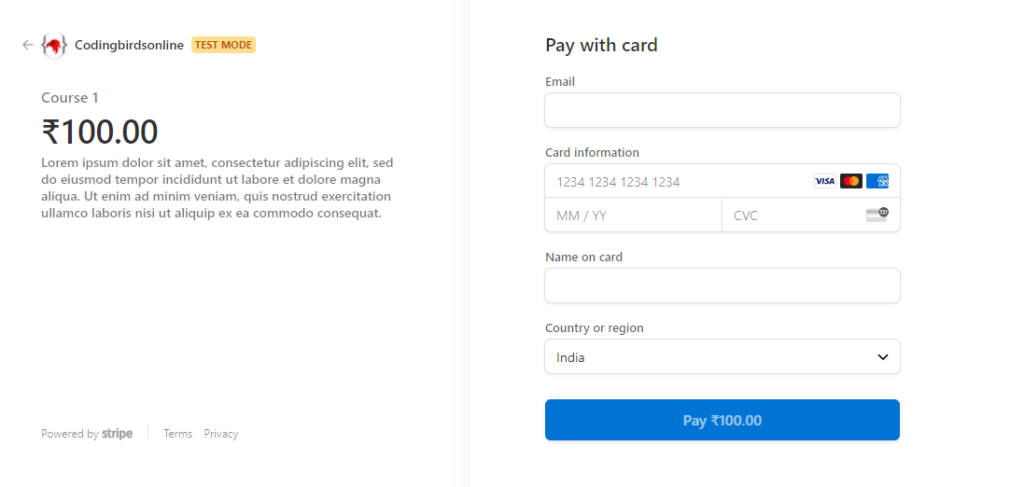
Basically, this post focuses on how to use PHPMailer to send an email with an attachment and we will learn how to send an email via Gmail SMTP Server using PHP contact form. You check this demo also before starting to code.

Sounds great? Let’s move forward to learn how to send email from Gmail using PHPMailer with attachment files from scratch. I am assuming you have a create a project directory in your local or in a server as per your choice.

Check is also: How to Generate PDFs in PHP: A Beginner’s Guide

Discover how to generate PDFs in PHP dynamically! Learn to generate PDFs from HTML, on button click, and save them to a folder with our comprehensive guide.

In this example, I have a project directory as /projects/send-email-in-php-using-phpmailer/

Steps for sending Email in PHP using PHPMailer Contact Form

1. Install PHPMailer Library

So to add PHPMailer we can use composer. A composer is a tool for dependency management in PHP, that allows you to add/install the libraries and packages. You can go to the download page download the Composer-Setup.exe, and get it installed on your machine. To verify the installation open the command prompt and type in composer You will see the version and other information.

Alternatively, if you’re not using Composer, you can download PHPMailer as a zip file and extract it as PHPMailer folder inside your project directory.

To add PHPMailer via composer just open the command prompt inside your project directory and hit the following command or you can refer to the official documentation about this.

composer require phpmailer/phpmailer

2. Get the App Password from Google

In earlier days we used to have Less Secure App an option in Google account settings, we just had to disable it and we were able to send emails using the same Gmail account password.

But things have changed now, Google has upgraded its security policies. So what do I do now? you must be asking this question right? Don’t worry, Let me tell you how because we are using Google’s Gmail so

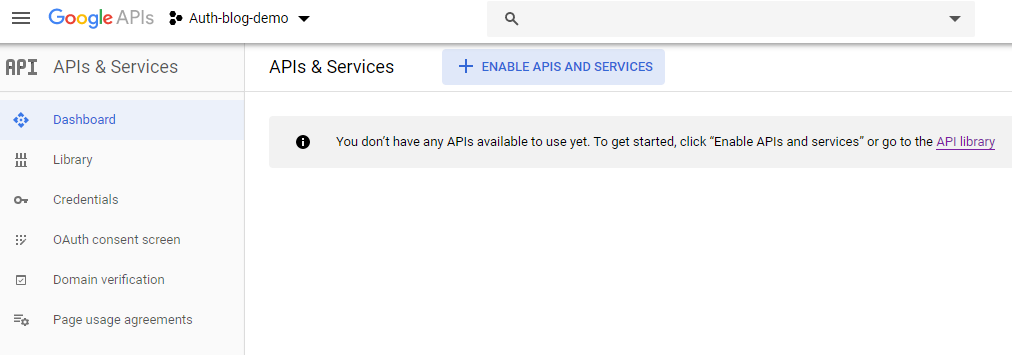
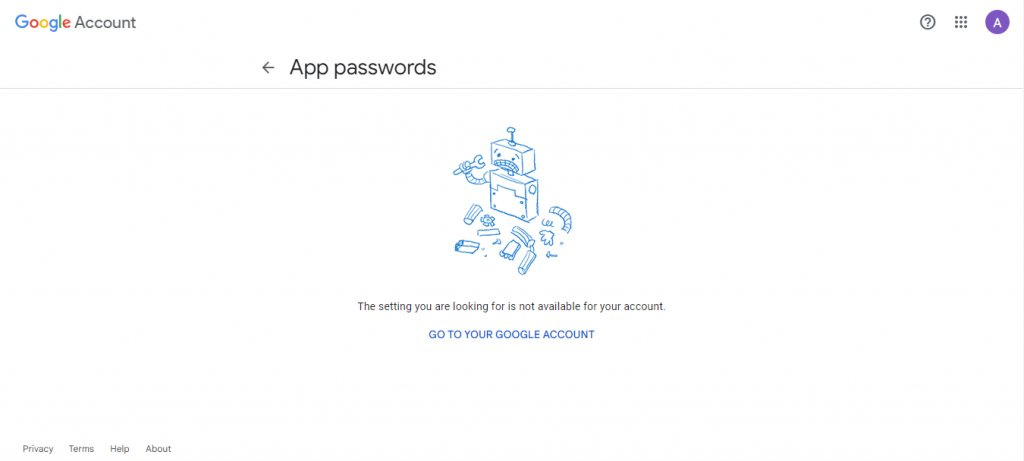
Open up the link https://myaccount.google.com/apppasswords and sign in with the account you want to send an email from. If you see this screen then first you need to enable 2-Factor Authentication then again open up the link.

Screen if 2-factor Authentication is not enabled.

send email in PHP using PHPMailer_image_1

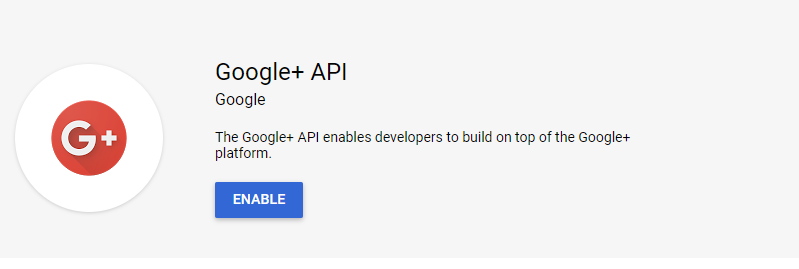
Screen if 2-factor Authentication is enabled.

send email in PHP using PHPMailer_image_2

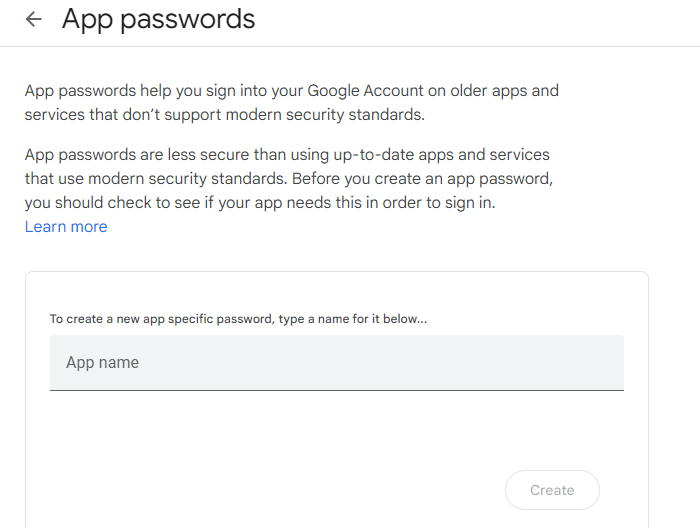
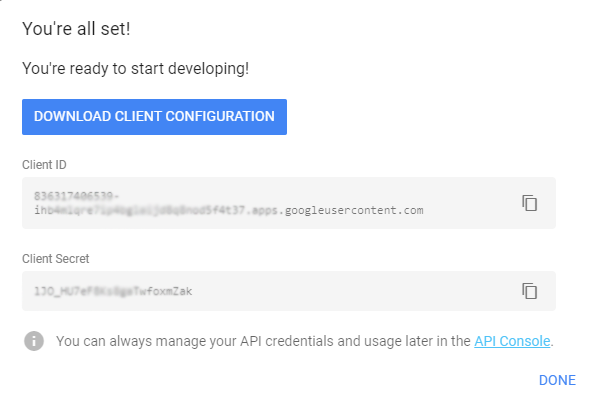
So now we have the option to create an App you can name it anything for example YourProjectName Click the create button, a popup will show which has 16 character password copied somewhere remove spaces between if any. This password we can use to send emails from Gmail in PHP using PHPMailer.

3. Create a PHPMailer contact form & email script

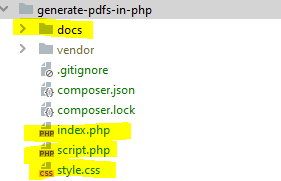
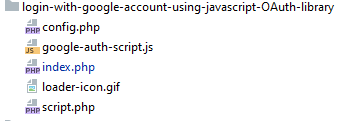
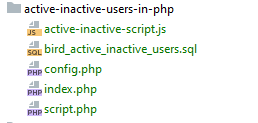
In my case, I have used Composer to add the PHPMailer package, so here are the files and folder structure. Don’t worry guys I also covered manual adding of it. The red arrow highlight shows manually added and inside } the curly braces are added by the composer. vendor folder composer.json and composer.lock files are created by the composer itself.

send email in PHP using PHPMailer_image_3

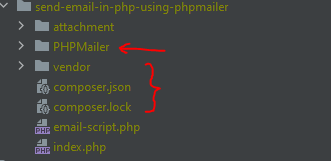
You need to create an attachment folder to store attachment files temporarily, after sending mail we delete them. So let’s create the rest of the files like index.php & email-script.php files, create them, and add the code given code.

index.php

<!doctype html>
<html lang="en">
<head>
    <meta http-equiv="Content-Type" content="text/html; charset=utf-8">
    <meta name="viewport" content="width=device-width, user-scalable=no, initial-scale=1.0, maximum-scale=1.0, minimum-scale=1.0">
    <meta http-equiv="X-UA-Compatible" content="ie=edge">
    <link rel="icon" href="https://codingbirdsonline.com/wp-content/uploads/2019/12/cropped-coding-birds-favicon-2-1-192x192.png" type="image/x-icon">
    <link rel="stylesheet" href="https://stackpath.bootstrapcdn.com/bootstrap/4.3.1/css/bootstrap.min.css">
    <link rel="stylesheet" href="https://use.fontawesome.com/releases/v5.8.2/css/all.css">
    <script type="text/javascript" src="https://cdnjs.cloudflare.com/ajax/libs/jquery/3.4.1/jquery.slim.min.js"></script>
    <script type="text/javascript" src="https://stackpath.bootstrapcdn.com/bootstrap/4.3.1/js/bootstrap.bundle.min.js"></script>
    <title>Send email in PHP using PHPMailer with attachment | CodingBirdsOnline</title>
</head>
<body>
    <div class="container">
        <div class="row">
            <div class="col-sm-9 col-md-7 col-lg-5 mx-auto">
                <div class="card card-signin my-5">
                    <?php
                    session_start();
                    if(isset($_SESSION['success_message'])){
                        echo '<div class="alert alert-success">
                                  <strong>Success!</strong> '.$_SESSION['success_message'].'
                               </div>';
                    }
                    if(isset($_SESSION['error_message'])){
                        echo '<div class="alert alert-danger">
                                  <strong>Error!</strong> '.$_SESSION['error_message'].'
                               </div>';
                    }
                    session_destroy();
                    ?>
                    <div class="card-body">
                        <center>
                            <img width="50" src="https://codingbirdsonline.com/wp-content/uploads/2020/01/cropped-coding-birds-online-favicon-192x192.png">
                        </center>
                        <h5 class="card-title text-center">Send email in PHP using PHPMailer with attachment</h5>
                        <form action="email-script.php" method="post" class="form-signin" enctype="multipart/form-data">
                            <div class="form-label-group">
                                <label for="to_email">To <span style="color: #FF0000">*</span></label>
                                <input type="email" name="to_email" id="to_email" class="form-control" placeholder="To" required />
                            </div> <br/>
                            <div class="form-label-group">
                                <label for="subject">Subject <span style="color: #FF0000">*</span></label>
                                <input type="text" name="subject" id="subject" class="form-control" placeholder="Subject" required/>
                            </div> <br/>
                            <label for="contact">Attachment</label>
                            <div class="form-label-group">
                                <input type="file" id="attachment" name="attachment"/>
                            </div><br/>
                            <label for="subject">Message <span style="color: #FF0000">*</span></label>
                            <div class="form-label-group">
                                <textarea type="text" id="message" name="message"  class="form-control" placeholder="Message" required></textarea>
                            </div><br/> <br/>
                            <button type="submit" name="sendMailBtn" value="Send Email" class="btn btn-lg btn-primary btn-block text-uppercase" >Send Email</button>
                        </form>
                    </div>
                </div>
            </div>
        </div>
    </div>
</body>
</html>

The form tag has an action to the email-script.php file, so here is the code for it.

email-script.php

<?php
session_start();
require 'vendor/autoload.php'; // <-- keep this line if using composer
use PHPMailer\PHPMailer\PHPMailer;
use PHPMailer\PHPMailer\Exception;
use PHPMailer\PHPMailer\SMTP;

//require 'PHPMailer/src/PHPMailer.php'; //<-- Add these files manually if not using composer
//require 'PHPMailer/src/Exception.php'; //<-- Add these files manually if not using composer
//require 'PHPMailer/src/SMTP.php'; //<-- Add these files manually if not using composer

if(isset($_POST['sendMailBtn'])){
    $to = $_POST['to_email'];
    $subject = $_POST['subject'];
    $message = $_POST['message'];
    $attachment = $_FILES['attachment']['tmp_name'];
    $emailAttachment = null;
    if($attachment){
        $attachmentDir = 'attachment/';
        $emailAttachment = $attachmentDir. $_FILES['attachment']['name'];
        /**
         * Add file type validation
         */
        $fileExtension = pathinfo($emailAttachment,PATHINFO_EXTENSION);
        if(!in_array($fileExtension, array('pdf', 'doc', 'docx', 'jpg', 'png', 'jpeg'))){
            $_SESSION['error_message'] = "Invalid file type: Only pdf, doc, docx, jpg, png, jpeg are allowed";
            header('Location: ' . $_SERVER['HTTP_REFERER']);
            exit;
        }
        move_uploaded_file($attachment, $emailAttachment);
    }
    sendEmail($to, $subject, $message, $emailAttachment);
    /**
     * Delete the uploaded attachment file after email sent
     */
    @unlink($emailAttachment);
}

/**
 * Sends email with attachment
 * @param $to
 * @param $subject
 * @param $message
 * @param $emailAttachment
 */
function sendEmail($to, $subject, $message, $emailAttachment) {
    try {
        $mail = new PHPMailer(true);
        $mail->SMTPDebug = SMTP::DEBUG_OFF;
        $mail->isSMTP();
        $mail->Host = 'smtp.gmail.com';
        $mail->SMTPAuth = true;
        $mail->Username = 'yourEmail@gmail.com';
        $mail->Password = 'xxxxxxxxxxxYourPassword'; // <-- which we generated from step2
        $mail->SMTPSecure = PHPMailer::ENCRYPTION_SMTPS;
        $mail->Port = 465;

        $mail->setFrom('yourEmail@gmail.com', 'Coding Birds'); //<-- 2nd param is optional
        $mail->addAddress($to, 'Ankit'); //<-- 2nd param is optional

        $mail->isHTML(false); //<-- make it true if sending HTML content as message
        $mail->Subject = $subject;
        $mail->Body = $message;
        if($emailAttachment){
            $mail->addAttachment($emailAttachment);
        }
        $mail->send();
        $_SESSION['success_message'] = "Email Message has been sent successfully";
    }catch (Exception $e){
        $_SESSION['error_message'] =  "Message could not be sent. Mailer Error: {$mail->ErrorInfo}";
    }
    header('Location: ' . $_SERVER['HTTP_REFERER']);
}

3. Run the code

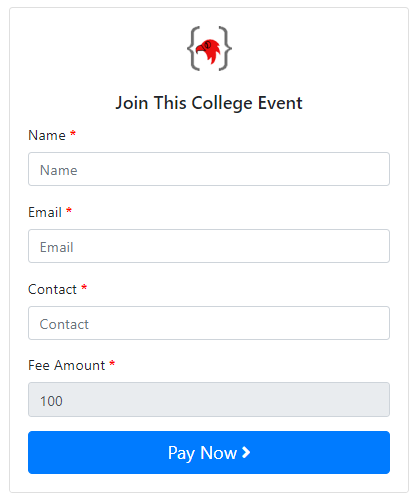
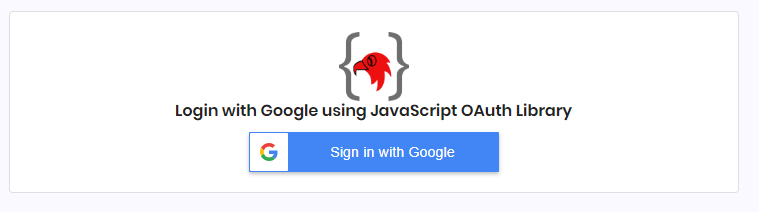
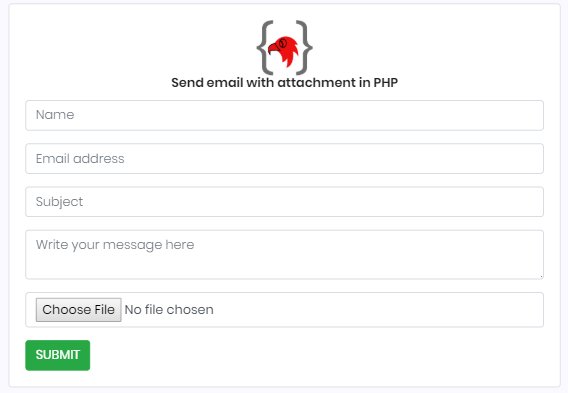
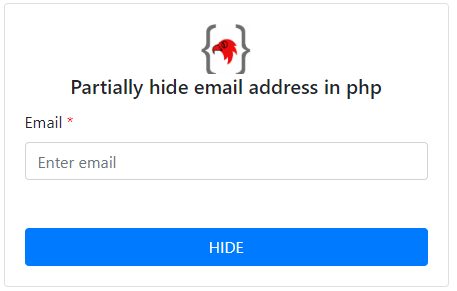
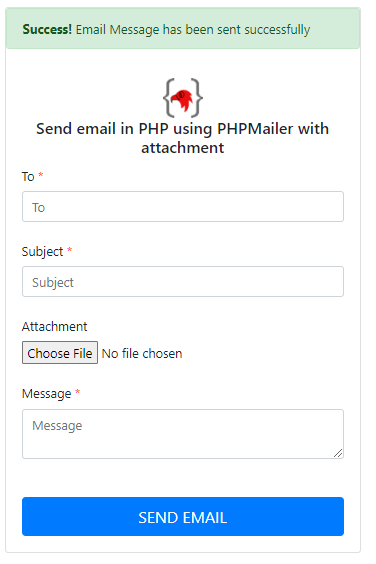
Boom!!!! our job is done, So let’s try to execute and run the code, if you are following the same folder structure then open http://localhost/projects/send-email-in-php-using-phpmailer You should see this screen if everything went well.

send email in PHP using PHPMailer_image_4

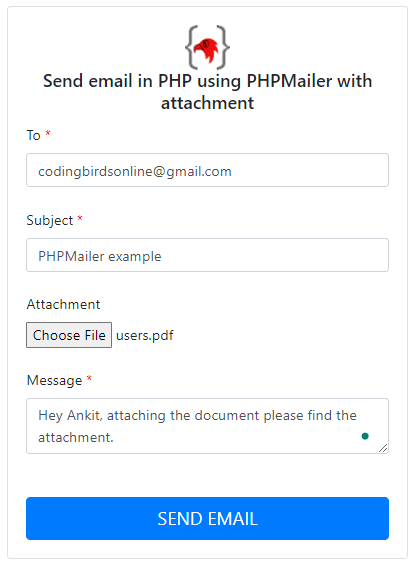
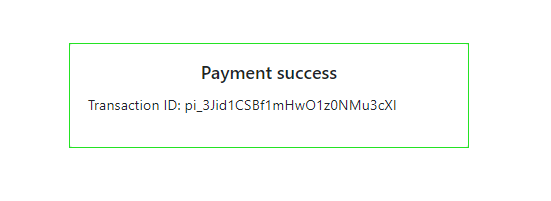
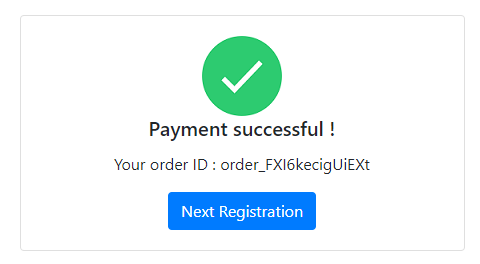
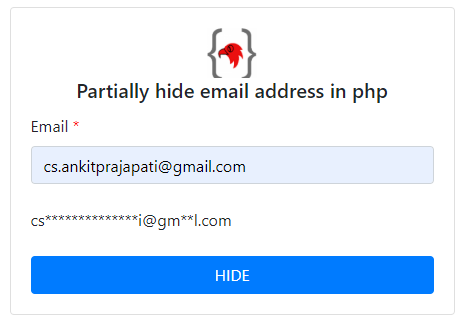
Now let’s fill in the information in the form and click the SEND EMAIL button. If all goes well you will see the success message right at the top:

send email in PHP using PHPMailer_image_5
Gmail inbox email received_image_6

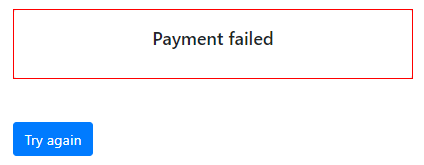
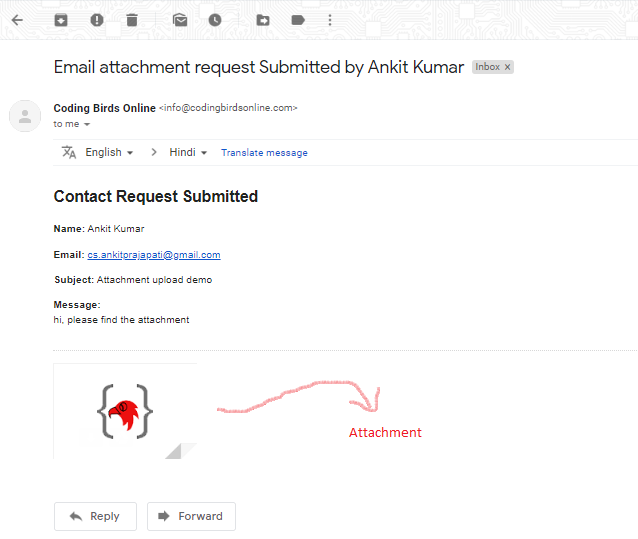
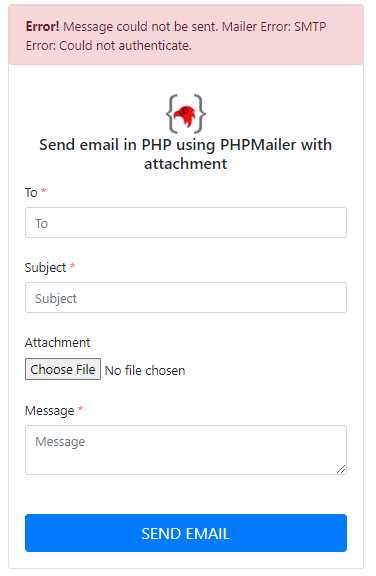
So I got the mail with an attachment you can see, And if something goes wrong, you see the error message as well instead of the success message at the same place. To simulate the error scenario I used the wrong password then this error came out.

Email sending failed received_image_7

Source Code & Demo

You can download the full 100% working source code from here. If You have gone through all the above steps then you can check this demo also before starting to code.

Conclusion

I hope you learned something from this post. If you have any suggestions they would be appreciated. And if you have any errors or issues please comment definitely I will try to help.

If this code works for you, please leave a nice ❤️ comment so that others can find it useful which always gives me the motivation to create such content.

Hi, Are you looking to build a dependent or cascading dropdown list dropdown in Angular? Then this blog post is for you. Here you will learn how to build country-state-city dropdowns in Angular step by step. This is called dependent dropdown or cascading dropdown functionality in web development.

This post focuses on creating country, state, and city dropdowns in Angular using PHP APIs. We will also discuss how to populate the dropdowns with data from a database or API and how to populate the select options from API. You check this demo also before starting to code.

Sounds great? Let’s move forward to learn how to build the dependent dropdown in Angular material using API from scratch.

So in this example, we will use PHP to mock the REST APIs in our Angular project. We will call these API endpoints to get the list of the data for countries, states & cities.

You may also like: How to Generate PDFs in PHP: A Beginner’s Guide

Discover how to generate PDFs in PHP dynamically! Learn to generate PDFs from HTML, on button click, and save them to a folder with our comprehensive guide.

Steps for Building Dependent Dropdowns for Location in Angular

  1. Install Node.js & Angular CLI
  2. Setup Angular project & UI
  3. Create Components, Modules & Service files
  4. Mock the REST APIs
  5. Run the code!!

1. Install Node.js & Angular CLI

If you don’t have Node on your machine then download it from the official website and install it. Once you are done now you need to install Angular. You can install the CLI using the npm package manager:

npm install -g @angular/cli

2. Setup Angular project & UI

Now head over to your working directory in file explorer and open a command prompt or terminal and hit the following command. In this example, the project name is the “dependent_dropdown” we are creating.

ng new dependent_dropdown

This command may take some time to complete depending on the internet connection you have. Once this is completed, move to the working directory by thiscd command and Install Angular Material via the following command.

cd dependent_dropdown
npm install bootstrap
ng add @angular/material

After installing these packages, go to angular.json file, inside architect > build > styles array add a new item "./node_modules/bootstrap/dist/css/bootstrap.min.css"

Also, if you are using Angular 15 so environment files will not be created, we need to set up those things manually. Create two files environment.ts and environment.prod.ts inside src > app > environments

Here is the screenshot for reference

Setting up bootstrap and environment files in Country State City Dropdowns in Angular

3. Create Components, Modules & Service files

Since we are using Angular Material, hence we need to import certain modules, so instead we will create a file AngularMaterialModule and import all required modules & finally import this module to AppModule. We need to create a service file also, to write some business logic to call HTTP services.

ng generate module angular-material
ng generate service services/dropdown // This will generate inside services folder

Update these files as follows.

AngularMaterialModule

import { CommonModule } from '@angular/common';
import { NgModule } from '@angular/core';
import { MatProgressBarModule } from '@angular/material/progress-bar';
import { MatFormFieldModule } from '@angular/material/form-field';
import { MatInputModule } from '@angular/material/input';
import { MatProgressSpinnerModule } from '@angular/material/progress-spinner';
import { MatSelectModule } from '@angular/material/select';

const materialModules = [
  MatInputModule,
  MatProgressBarModule,
  MatProgressSpinnerModule,
  MatSelectModule,
  MatFormFieldModule,
];
@NgModule({
  imports: [CommonModule, ...materialModules],
  exports: [...materialModules],
})
export class AngularMaterialModule {}

Now import this file into the AppModule file as below.

AppModule

import { NgModule } from '@angular/core';
import { BrowserModule } from '@angular/platform-browser';
import { AppRoutingModule } from './app-routing.module';
import { AppComponent } from './app.component';
import { BrowserAnimationsModule } from '@angular/platform-browser/animations';
import { AngularMaterialModule } from './angular-material.module';
import { HttpClientModule } from '@angular/common/http';
import { FormsModule, ReactiveFormsModule } from '@angular/forms';

@NgModule({
  declarations: [AppComponent],
  imports: [
    BrowserModule,
    AppRoutingModule,
    BrowserAnimationsModule,
    AngularMaterialModule, // <--added
    HttpClientModule, // <--added
    FormsModule, // <--added
    ReactiveFormsModule, // <--added
  ],
  providers: [],
  bootstrap: [AppComponent],
})
export class AppModule {}

Now let’s add some HTML UI to our component HTML file. Update your app.component.html code.

app.component.html

<mat-progress-bar
  mode="indeterminate"
  color="accent"
  *ngIf="loading"
></mat-progress-bar>

<div class="container mt-4">
  <div class="mt-3 mb-3" style="text-align: center">
    <img
      src="https://codingbirdsonline.com/wp-content/uploads/2020/01/cropped-coding-birds-online-favicon-180x180.png"
      width="50"
    />
  </div>
  <div class="card example-card" style="width: 50rem">
    <div class="card-body">
      <h5 class="card-title text-center m-2">Country, State & City Dropdown</h5>
      <form [formGroup]="dropdownForm">
        <div class="d-flex justify-content-center mt-4">
          <div class="p-2">
            <mat-form-field appearance="outline">
              <mat-label>Country</mat-label>
              <mat-select
                disableRipple
                formControlName="country"
                (valueChange)="selectCountry($event)"
              >
                <mat-option value="">Select</mat-option>
                <mat-option
                  *ngFor="let country of countries"
                  [value]="country.id"
                  [attr.data-country-name]="country.name"
                  >{{ country.name }}
                </mat-option>
              </mat-select>
            </mat-form-field>
          </div>
          <div class="p-2">
            <mat-form-field appearance="outline">
              <mat-label>State</mat-label>
              <mat-select
                disableRipple
                formControlName="state"
                (valueChange)="selectState($event)"
              >
                <mat-option value="">Select</mat-option>
                <mat-option
                  *ngFor="let state of states"
                  [value]="state.id"
                  [attr.data-state-name]="state.name"
                  >{{ state.name }}
                </mat-option>
              </mat-select>
            </mat-form-field>
          </div>
          <div class="p-2">
            <mat-form-field appearance="outline">
              <mat-label>City</mat-label>
              <mat-select disableRipple formControlName="city">
                <mat-option value="">Select</mat-option>
                <mat-option
                  *ngFor="let city of cities"
                  [value]="city.id"
                  [attr.data-city-name]="city.name"
                  >{{ city.name }}
                </mat-option>
              </mat-select>
            </mat-form-field>
          </div>
        </div>
        <p *ngIf="dropdownForm.value.country">
          {{ dropdownForm.value | json }}
        </p>
      </form>
    </div>
  </div>
</div>

app.component.css

.example-card {
  margin: 0 auto;
}

app.component.ts

import { Component, OnInit } from '@angular/core';
import { DropdownService } from './services/dropdown.service';
import { FormBuilder, FormGroup } from '@angular/forms';

@Component({
  selector: 'app-root',
  templateUrl: './app.component.html',
  styleUrls: ['./app.component.css'],
})
export class AppComponent implements OnInit {
  title = 'Country-State-City Dropdown';
  public loading = false;
  public dropdownForm!: FormGroup;
  public countries: any[] = [];
  public states: any[] = [];
  public cities: any[] = [];

  constructor(
    private dropdownService: DropdownService,
    private formBuiler: FormBuilder
  ) {}
  ngOnInit(): void {
    /**
     * Intialize form with default value null
     */
    this.dropdownForm = this.formBuiler.group({
      country: [null],
      state: [null],
      city: [null],
    });
    /**
     * load all country data at page load
     */
    this.getCountries();
  }
  /**
   * loads all country data
   * @returns void
   */
  private getCountries() {
    this.loading = true;
    this.dropdownService.getCountries().subscribe(
      (response) => {
        this.countries = response.data;
        console.log(this.countries);
        this.loading = false;
      },
      (error) => {
        console.log('Something went wrong: ', error);
      }
    );
  }

  /**
   * Selects country, and gets the states for it
   * @param country
   * @returns void
   */
  public selectCountry(country: any) {
    if (!country) {
      this.dropdownForm.controls['state'].setValue('');
      this.dropdownForm.controls['city'].setValue('');
      this.states = [];
      this.cities = [];
      return;
    }
    this.loading = true;
    const countryId = parseInt(country);
    this.dropdownService.getStates(countryId).subscribe(
      (response) => {
        this.states = response.data;
        this.loading = false;
      },
      (error) => {
        console.log('Something went wrong: ', error);
      }
    );
  }

  /**
   * Selects the state and gets cities for it
   * @param state
   * @returns void
   */
  public selectState(state: any) {
    if (!state) {
      this.dropdownForm.controls['city'].setValue('');
      this.cities = [];
      return;
    }
    this.loading = true;
    const stateId = parseInt(state);
    this.dropdownService.getCities(stateId).subscribe(
      (response) => {
        this.cities = response.data;
        this.loading = false;
      },
      (error) => {
        console.log('Something went wrong: ', error);
      }
    );
  }
}

dropdown.service.ts

import { HttpClient } from '@angular/common/http';
import { Injectable } from '@angular/core';
import { Observable } from 'rxjs';
import { environment } from 'src/environments/environment';

@Injectable({
  providedIn: 'root',
})
export class DropdownService {
  // Update your API path here
  private BASE_URL = environment.apiUrl;
  constructor(private http: HttpClient) {}

  /**
   * Fetch All Countries
   * @returns Observable
   */
  public getCountries(): Observable<any> {
    return this.http.get<any>(this.BASE_URL + 'getcountry');
  }
  /**
   * Get states for a country
   * @param countryId
   * @returns Observable
   */
  public getStates(countryId: number): Observable<any> {
    return this.http.get<any>(
      this.BASE_URL + 'getstate&country_id=' + countryId
    );
  }
  /**
   * Get cities for a state
   * @param stateId
   * @returns Observable
   */
  public getCities(stateId: number): Observable<any> {
    return this.http.get<any>(this.BASE_URL + 'getcity&state_id=' + stateId);
  }
}

environment.ts

export const environment = {
  production: false,
  apiUrl:
    'http://localhost/projects/codingbirds_/country-state-city-dropdown-api/index.php?endpoint=', // you can change your localhost path for api.
};

environment.prod.ts

export const environment = {
  production: true,
  apiUrl:
    'https://demo.codingbirdsonline.com/country-state-city-dropdown-api/index.php?endpoint=',
};

4. Mock the REST APIs

Since our frontend work is done, now we need to set up the backend APIs, No No… You don’t need to create APIs, I have already done it for you. Download it from here & setup in locally or on your server.

Or if you do not want to set it up, you can keep the same apiUrl into your environment.ts file as in environment.prod.ts

I already deployed these REST APIs to my server. You can access these APIs by appending these endpoints to the base URL https://demo.codingbirdsonline.com/country-state-city-dropdown-api/

Here are endpoints, params & methods for your reference.

API endpointParametersMethod Description
/index.php?endpoint=getcountry..GETReturn the countries in json format
/index.php?endpoint=getstate&country_id={countryId}country_idGETReturn the states for a country id in json format
/index.php?endpoint=getcity&state_id={stateId} state_id GETReturn the cities for a state id in json format

5. Run the code!!

So All the coding part is done, Now it is time to see the actual efforts we made to create Hierarchical location dropdowns in Angular. Save all the files and navigate to http://localhost:4200/ to see the output. You will see something like this.

Country State City Dropdowns in Angular Output GIF

Source Code & Demo

You can download the full 100% working source code from here. You check this demo also before starting to code. Watch this YouTube video explaining everything about dependent dropdown in Angular using the Country State City dropdown example.

Conclusion

I hope you learned what I explained in the above steps, If you have any suggestions or any errors, or issues please let me know in the comments, definitely I will try to help.

As I have shown If this code works for you, please leave a nice ❤️ comment so that others can find it useful which always gives me the motivation to create such content.

Hi, Do you need to generate PDFs dynamically in your PHP web application? Look no further! In this step-by-step guide, we’ll show you how to generate PDFs in PHP using a variety of tools and techniques. From setting up your development environment to generating PDFs from HTML, we’ll cover all the bases. Whether you need to generate PDFs on button click, save them to a folder, or create custom PDFs, this guide has got you covered.

We’ll also explore popular PDF libraries for PHP and share best practices for optimizing PDF generation performance. So, let’s dive in and learn how to generate PDFs in PHP like a pro! So let’s get started with the steps by step guide. You check this demo also before starting to code.

Check Also: Load more data using jQuery, AJAX, and PHP

when you click on the Load more button it will load another 2 quotes and append them to the current list. This process will go so on and so far until there are no remaining quotes

Follow these steps to generate PDFs in PHP

1. Install Composer

A composer is a tool for dependency management in PHP, that allows you to add/install the libraries and packages for your project and it will manage (install/update) them for you. Go to the download page download the Composer-Setup.exe, and get it installed on your machine. To verify the installation open the command prompt and type in “composer” You will see the version and other information.

2. Install mPDF Library

For generating PDFs using PHP, Composer is required because we are going to use mPDF which is a PHP library that will be installed via Composer. So go to your project folder, open the command prompt & hit the command given below, this will install the mPDF library.

composer require mpdf/mpdf

3. Create files & folders

So we are ready to generate PDF in PHP, before that we need to create files & folders and create the highlighted files in your project directory as per the given screenshot. Vendor folder, composer.json & composer. lock file will be created automatically when you complete step-2.

Let me just walk you through these files and folders:

  • “docs” is the folder to store the generated PDF
  • index.php is the main file that will display the UI screen to generate pdf on button click.
  • script.php file will contain the business logic to create a pdf in PHP
  • style.css file contains the CSS to style the PDF

4. Write the code

So we have created the files and folder, and after that update your files with the code given below.

index.php

<!doctype html>
<html lang="en">
<head>
    <title>Generate PDfs in PHP - Coding Birds Online</title>
    <meta http-equiv="Content-Type" content="text/html; charset=utf-8">
    <meta name="viewport" content="width=device-width, user-scalable=no, initial-scale=1.0, maximum-scale=1.0, minimum-scale=1.0">
    <meta http-equiv="X-UA-Compatible" content="ie=edge">
    <link rel="icon" href="https://codingbirdsonline.com/wp-content/uploads/2019/12/cropped-coding-birds-favicon-2-1-192x192.png" type="image/x-icon">
    <link rel="stylesheet" href="https://stackpath.bootstrapcdn.com/bootstrap/4.3.1/css/bootstrap.min.css">
    <link rel="stylesheet" href="https://use.fontawesome.com/releases/v5.8.2/css/all.css">
    <script src="https://ajax.googleapis.com/ajax/libs/jquery/3.4.1/jquery.min.js"></script>
</head>
<body>
<div class="container">
    <div class="row">
        <div class="col-sm-9 col-md-7 col-lg-5 mx-auto">
            <div class="card card-signin my-5">
                <div class="card-body">
                    <center>
                        <img width="50" src="https://codingbirdsonline.com/wp-content/uploads/2019/12/cropped-coding-birds-favicon-2-1-192x192.png">
                        <h5 class="card-title text-center mt-4">Click to Download PDF</h5>
                        <img src="https://codingbirdsonline.com/cdn/icons/download.png"
                    </center>
                    <div class="mt-3">
                        <a href="script.php" class="btn btn-danger">Click to Download PDF</a>
                    </div>
                </div>
            </div>
        </div>
    </div>
</div>
</body>
</html>

script.php

<?php
require("vendor/autoload.php");

try {
    $html = getPdfContent();
    $filename = "invoice.pdf";
    $stylesheet = file_get_contents('style.css');
    $mpdf = new \Mpdf\Mpdf();
    $mpdf->WriteHTML($stylesheet,\Mpdf\HTMLParserMode::HEADER_CSS);
    $mpdf->WriteHTML($html);
    ob_clean();
    $mpdf->Output($filename, "D"); // This downloads the file
    $mpdf->Output("docs/$filename", "F"); // This saves the file to folder
} catch (\Mpdf\MpdfException $e) {
    echo "Something went wrong: ". $e->getMessage();
}
/**
 * This function prepares the PDF content
 * @return html|string
 */
function getPdfContent(){
    /**
     * Here this $student is just an static data
     * Create your own business logic like get the data from db, modify, loop...etc
     */
    $students = array(
        array(
          "name" => "Ankit",
          "email" => "ankit@ankit.com",
          "contact" => "xxxxxxx85555",
          "country" => "India",
        ),
        array(
            "name" => "Parth",
            "email" => "parth@gmail.com",
            "contact" => "xxxxxxx88855",
            "country" => "India",
        ),
        array(
            "name" => "Rohit",
            "email" => "rohit@gmail.com",
            "contact" => "xxxxxxx85525",
            "country" => "India",
        ),
        array(
            "name" => "Allex",
            "email" => "allex@gmail.com",
            "contact" => "xxxxxxx85555",
            "country" => "India",
        )
    );
    $table = '<table>
              <tr>
                <th>#</th>
                <th>Name</th>
                <th>Email</th>
                <th>contact</th>
                <th>Country</th>
              </tr>';
    foreach ($students as $key => $student){
        $table .= '
              <tr>
                <td>'.($key+1).'</td>
                <td>'.$student['name'].'</td>
                <td>'.$student['email'].'</td>
                <td>'.$student['contact'].'</td>
                <td>'.$student['country'].'</td>
              </tr>';
    }
    $table .= '</table>';
    return $table;
}

style.css

table {
    border-collapse: collapse;
    width: 100%;
}
th {
    background: #ccc;
    text-align: left;
}

th, td {
    border: 1px solid #ccc;
    padding: 8px;
}

tr:nth-child(even) {
    background: #efefef;
}

tr:hover {
    background: #d1d1d1;
}

5. Run It!!

Since we have completed writing the code, and now it is time to see what our changes look like. So save all files and after that open the project in your local host. In my case it is http://localhost/projects/codingbirds_/generate-pdfs-in-php.

Here is the output screenshot that looks like.

Generate PDFs in PHP

When you click, it will generate PDF and save in a folder(docs).

Source Code & Demo

You can download the full 100% working source code from here. You check this demo also before starting to code.

Conclusion

I hope you learned what I explained in the above steps, If you have any suggestions are appreciated. And if you have any errors or issues please comment definitely I will try to help. You can download the full 100% working source code from here.

As I have shown If this code works for you, please leave a nice ❤️ comment so that others can find it useful which always gives me the motivation to create such content.

Hello folks,
You might have seen the feature of Load More. If you want to develop such a feature as “Load more data using jQuery” then you are in right place. You check this demo also before starting to code.

It can be for anything like load more products if you are in e-commerce website, It can be load more post you are visiting any blog website or in general, it can be load more records.
It’s a kind of pagination, yes but it will have a Load More button instead pagination links or page numbers. We will talk about other pagination as well in the upcoming article. For now, we will develop this as a Load more option. However, if you want to check we already have a similar article.

Check Also: How to integrate data table plugin in HTML and CSS

DataTable is a plug-in for the jQuery JavaScript library. It is a highly flexible tool, built upon the foundations of progressive enhancement, that adds all of these advanced features to any HTML table

In this post, we are going to implement a kind of pagination called Load More. We will load Quotes. 
By default, we will load 2 quotes in this example but you can define the number in the constant file or customize this solution as per your requirement.

Now when you click on the Load more button it will load another 2 quotes and append them to the current list. This process will go so on and so far until there are no remaining quotes. The load more button will be hidden if there are no more quotes remaining to load. So let’s start to develop load more data using jQuery, and AJAX.

Step 1: Database Setup

Since we are fetching all quotes/records from the database first of all we need to set up the database. Create a database, and create a table “bird_quotes” because we take this table name in code. In the next section, you will get the SQL query for the same.

Step 2: Code & Files setup

Now we need to create these files as shown in the below screenshot, I will explain the purpose of these files. Now let’s create code for each file and understand the purpose also.

Step 3: Lets code

constant.php

The purpose of creating this is to store database credentials & pagination settings. In the third part of this article, we considered loading 2 records each time. So this number can be changed from the constant.php file

<?php
/**
 * Database configuration
 */
define('DB_HOST', 'localhost');
define('DB_USERNAME', 'root');
define('DB_PASSWORD', '');
define('DB_NAME', 'codingbirds');

/**
 * Define no. of records to be load each time
 */
define('PER_PAGE', 2);

Database.php

This file is a PHP class of database connection. As you know we require a database connection with PHP, So here is the code for this file.

<?php
include_once "constants.php";
class Database
{
    /**
     * @var mysqli
     */
    public $connection;

    public function __construct()
    {
        $this->connection = new mysqli(DB_HOST,DB_USERNAME,DB_PASSWORD,DB_NAME);
        if (!$this->connection) {
            die("Error in database connection". $this->connection->connect_error);
        }
    }
}

index.php

This index.php is the main file that gets loaded and shows the 2 quotes by default and shows “ajax load more” button UI. Below is the code for this file.

<!doctype html>
<html lang="en">
<head>
    <meta charset="UTF-8">
    <meta name="viewport" content="width=device-width, user-scalable=no, initial-scale=1.0, maximum-scale=1.0, minimum-scale=1.0">
    <meta http-equiv="X-UA-Compatible" content="ie=edge">
    <link rel="icon" href="https://codingbirdsonline.com/wp-content/uploads/2019/12/cropped-coding-birds-favicon-2-1-192x192.png" type="image/x-icon">
    <link rel="stylesheet" href="https://stackpath.bootstrapcdn.com/bootstrap/4.3.1/css/bootstrap.min.css">
    <link rel="stylesheet" href="https://use.fontawesome.com/releases/v5.8.2/css/all.css">
    <script src="https://ajax.googleapis.com/ajax/libs/jquery/3.4.1/jquery.min.js"></script>
    <script type="text/javascript" src="https://stackpath.bootstrapcdn.com/bootstrap/4.3.1/js/bootstrap.bundle.min.js"></script>
    <title>How to load more records using php, mysql & AJAX - Coding Birds Online</title>
    <style> .blockquote  { font-size: 1.1rem !important; }</style>
</head>
<body>
<div class="container">
   <div class="mt-3 mb-3">
       <center>
           <img src="https://codingbirdsonline.com/wp-content/uploads/2020/01/cropped-coding-birds-online-favicon-180x180.png" width="50"/>
       </center>
   </div>
    <div class="row">
        <div class="col-sm-9 col-md-7 col-lg-5 mx-auto">
            <div id="quotes-container"></div>
            <input type="hidden" id="page" value="0"/>
            <button
                type="button"
                id="load-more-btn"
                onclick="loadMoreQuotes();"
                class="btn btn-sm btn-success btn-block"
                >Load more...
                <div id="loading" class="spinner-border spinner-border-sm d-none" role="status">
                    <span class="sr-only">Loading...</span>
                </div>
            </button>
        </div>
    </div>
    <div class="row">
        <script async src="https://pagead2.googlesyndication.com/pagead/js/adsbygoogle.js"></script>
        <!-- middle-ads -->
        <ins class="adsbygoogle"
             style="display:block"
             data-ad-client="ca-pub-5191137430270102"
             data-ad-slot="7861133754"
             data-ad-format="auto"
             data-full-width-responsive="true"></ins>
        <script>
            (adsbygoogle = window.adsbygoogle || []).push({});
        </script>
    </div>
</div>
<script src="load-more-quotes.js"></script>
</body>
</html>

load-more-quotes.js

This file contains JavaScript & jQuery logic to load more data. loadMoreQuotes( ) function is called the first time automatically when the page load, later it is called with the click of a button.

$(document).ready(function(){
    /**
     * Call load quotes as soon as page ready
     */
    loadMoreQuotes();
});
function loadMoreQuotes(){
    let page = parseInt($("#page").val());
    page = page + 1;
    let quotesHtml = ``;
    $.ajax({
        url: "load-more-script.php",
        method: "POST",
        data: {
            request_name: "load-more-quotes",
            page: page,
        },
        beforeSend: function(){
            /**
             * Show the loading icon in load more button
             */
            $("#loading").removeClass('d-none');
        },
        success: function (response){
            /**
             * Prepare the html of quotes
             * @type {any}
             */
            response = JSON.parse(response);
            let quotes = response.data;
            if(quotes.length > 0) {
                $.each(quotes, function (key, value) {
                    quotesHtml += `<div class="card card-signin my-3">
                                    <div class="card-body">
                                        <blockquote class="blockquote mb-0">
                                            <p>${value.quote}</p>
                                            <footer class="blockquote-footer">Someone famous in <cite title="Source Title">${value.author}</cite></footer>
                                        </blockquote>
                                    </div>
                                </div>`;
                });
                /**
                 * Update the page page number to track the no. of calls
                 * Append quotes html prepared to div
                 * Conditionally show/hide the load more button
                 */
                $("#page").val(page);
                $("#quotes-container").append(quotesHtml);
                if (response.remaining_quotes == 0) {
                    $("#load-more-btn").hide();
                }
            }
        },
        error: function(errorResponse){
            console.error(errorResponse)
        },
        complete: function(){
            /**
             * Hide loading icon each time when api call completes
             */
            $("#loading").addClass('d-none');
        }
    })
}

load-more-script.php

This file is a PHP script file to perform our load more pagination from the backend. It returns the response in the form of JSON.

<?php
require_once "constants.php";
require_once "Database.php";
require_once "Quote.php";
/**
 * Prepares the Database, Quote class objects
 */
$db = new Database();
$quote = new Quote();
if (isset($_POST['request_name'])){
    if($_POST['request_name'] == 'load-more-quotes'){
        /**
         * Make the offset, limit
         */
        $offset = ($_POST['page'] - 1) * PER_PAGE;
        $limit = PER_PAGE;
        $quotesData = array();
        $pagination = array(
            'offset' => $offset,
            'limit' => $limit,
        );
        $quotes = $quote->loadQuotes($db->connection, $pagination);
        $totalQuotes = $quote->totalQuotes($db->connection);
        if($quotes){
            while ($quote = $quotes->fetch_object()){
                $quotesData[] = $quote;
            }
        }
        echo json_encode(array(
            'data' => $quotesData,
            'remaining_quotes' => $totalQuotes - PER_PAGE * $_POST['page'],
        ));
    }
}

Quote.php

This is a PHP class file which two functions to load the quotes and count total quotes respectively.

<?php
class Quote
{
    /**
     * Load the quotes based on limit. offset
     * @param $connection
     * @param $pagination
     * @return object
     */
    public function loadQuotes($connection, $pagination)
    {
        $query = "SELECT * FROM bird_quotes LIMIT ". $pagination['offset']. ",". $pagination['limit'];
        $result = $connection->query($query) or die("Error in query".$connection->error);
        return $result;
    }

    /**
     * Calculates the total quotes in database
     * @param $connection
     * @return int
     */
    public function totalQuotes($connection)
    {
        $query = "SELECT COUNT(*) FROM bird_quotes as quotes_count";
        $result = $connection->query($query) or die("Error in query".$connection->error);
        return $result->fetch_row()[0];
    }
}

SQL code to create table

-- phpMyAdmin SQL Dump
-- version 5.0.4
-- https://www.phpmyadmin.net/
--
-- Host: 127.0.0.1
-- Generation Time: Aug 10, 2022 at 08:44 AM
-- Server version: 10.4.14-MariaDB
-- PHP Version: 7.4.15

SET SQL_MODE = "NO_AUTO_VALUE_ON_ZERO";
START TRANSACTION;
SET time_zone = "+00:00";


/*!40101 SET @OLD_CHARACTER_SET_CLIENT=@@CHARACTER_SET_CLIENT */;
/*!40101 SET @OLD_CHARACTER_SET_RESULTS=@@CHARACTER_SET_RESULTS */;
/*!40101 SET @OLD_COLLATION_CONNECTION=@@COLLATION_CONNECTION */;
/*!40101 SET NAMES utf8mb4 */;

--
-- Database: `codingbirds`
--

-- --------------------------------------------------------

--
-- Table structure for table `bird_quotes`
--

CREATE TABLE `bird_quotes` (
  `id` int(11) NOT NULL,
  `quote` text NOT NULL,
  `author` varchar(100) NOT NULL
) ENGINE=InnoDB DEFAULT CHARSET=utf8mb4;

--
-- Dumping data for table `bird_quotes`
--

INSERT INTO `bird_quotes` (`id`, `quote`, `author`) VALUES
(1, 'Lorem ipsum dolor sit amet, consectetur adipiscing elit.', 'Source Title'),
(2, 'Lorem ipsum dolor sit amet, consectetur adipiscing elit.', 'Source Title'),
(3, 'Lorem ipsum dolor sit amet, consectetur adipiscing elit.', 'Source Title'),
(4, 'Lorem ipsum dolor sit amet, consectetur adipiscing elit.', 'Source Title'),
(5, 'Lorem ipsum dolor sit amet, consectetur adipiscing elit.', 'Source Title'),
(6, 'Lorem ipsum dolor sit amet, consectetur adipiscing elit.', 'Source Title'),
(7, 'Lorem ipsum dolor sit amet, consectetur adipiscing elit.', 'Source Title'),
(8, 'Lorem ipsum dolor sit amet, consectetur adipiscing elit.', 'Source Title'),
(9, 'Lorem ipsum dolor sit amet, consectetur adipiscing elit.', 'Source Title'),
(10, 'Lorem ipsum dolor sit amet, consectetur adipiscing elit.', 'Source Title');

--
-- Indexes for dumped tables
--

--
-- Indexes for table `bird_quotes`
--
ALTER TABLE `bird_quotes`
  ADD PRIMARY KEY (`id`);

--
-- AUTO_INCREMENT for dumped tables
--

--
-- AUTO_INCREMENT for table `bird_quotes`
--
ALTER TABLE `bird_quotes`
  MODIFY `id` int(11) NOT NULL AUTO_INCREMENT, AUTO_INCREMENT=11;
COMMIT;

/*!40101 SET CHARACTER_SET_CLIENT=@OLD_CHARACTER_SET_CLIENT */;
/*!40101 SET CHARACTER_SET_RESULTS=@OLD_CHARACTER_SET_RESULTS */;
/*!40101 SET COLLATION_CONNECTION=@OLD_COLLATION_CONNECTION */;

Step 4: Run the code

Congrats! now you have reached the final step to run the code & get your desired output. As you navigate this localhost URL to your browser you will get something like as below.

Now if you want to load more quotes, just click on the button you will get 2 more quotes without page refresh since we are using AJAX. Why 2 quotes because we defined this value in the constants.php file, you can change it according to your needs.

Source Code & Demo

You can download the full 100% working source code from here. You check this demo also before starting to code.

Conclusion

I hope you learned what I explained in the above steps, If you have any suggestions are appreciated. And if you have any errors comment here, I will help. You can download the full 100% working source code from here.

Ok, Thanks for reading this article, see you in the next post. If this code works for you, please leave a comment so that others can find it useful which gives me the motivation to create such content.

Hellowww friends! after a long time I am back again with another post. Today I have come with stripe Payment Gateway Tutorial. So let’s start the post. Let’s talk about stripe payment gateway integration.

Stripe is one of the most used payment gateway used across the world. It is a cloud payment gateway platform that helps to accept and manage online transactions anywhere in the world. It provides complete solutions to process online payments and also offers great features like a custom UI toolkit, embeddable checkout, consolidated reports, and much more.

To start payment gateway integration in PHP you need to have a merchant/owner account in stripe means if you have a business or any e-commerce website and want to accept online payment then you need to have an owner account. You can create and upload other verifications details like bank account and identity details. I hope you have completed these steps and just looking for code and procedure to integrate. So let’s move to the next step. Check this demo.

Check also: Razorpay Payment Gatway Integration

Get your API keys

Login to your stripe dashboard, go to the right top corner under the profile dropdown you will see the developer link. Find the secret key and copy keep it somewhere we are going to use it.

Project & Code Setup

Now we need an official Stripe PHP library. If you composer then it’s fine otherwise we need to install the composer. Composer is a dependency manager tool. Click here to download it from the composer website and install it. It is very simple to install. Now create a project folder in your xampp/wampp project directory.

After you have created the project folder, open CMD inside the project directory and run the below command.

Stripe payment gateway integration

Install Stripe PHP Library

composer require stripe/stripe-php

After your command completes it will create a vendor folder, composer.json & composer.lock files. We don’t need to touch these files. Now rest of the files we need to create our project directory.

integrate-stripe-payment-gateway-in-files-directory-php-coding-birds-online

index.php is the home page which is the simple event registration & fee payment form. This is we are going to have a number of registrations and accept fees via stripe. Here is the code of this file.

Database Setup

To keep the number of registrations and payment status we need to create a database. In this case database name is “codingbirds” and the table is called “bird_stripe_payments

After creating the database go to SQL and paste this code and run to create the table.

--
-- Table structure for table `bird_stripe_payments`
--
CREATE TABLE `bird_stripe_payments` (
  `id` int(10) NOT NULL,
  `name` varchar(255) NOT NULL,
  `email` varchar(255) NOT NULL,
  `contact` varchar(12) NOT NULL,
  `amount` decimal(10,2) NOT NULL,
  `payment_status` enum('Pending','Completed') NOT NULL DEFAULT 'Pending',
  `payment_intent` text DEFAULT NULL,
  `created_at` datetime NOT NULL
) ENGINE=InnoDB DEFAULT CHARSET=utf8mb4;

Code & Files Setup

<!doctype html>
<html lang="en">
<head>
    <meta charset="UTF-8">
    <meta name="viewport" content="width=device-width, user-scalable=no, initial-scale=1.0, maximum-scale=1.0, minimum-scale=1.0">
    <meta http-equiv="X-UA-Compatible" content="ie=edge">
    <link rel="icon" href="https://codingbirdsonline.com/wp-content/uploads/2019/12/cropped-coding-birds-favicon-2-1-192x192.png" type="image/x-icon">
    <link rel="stylesheet" href="https://stackpath.bootstrapcdn.com/bootstrap/4.3.1/css/bootstrap.min.css">
    <link rel="stylesheet" href="https://use.fontawesome.com/releases/v5.8.2/css/all.css">
    <script src="https://ajax.googleapis.com/ajax/libs/jquery/3.4.1/jquery.min.js"></script>
    <script type="text/javascript" src="https://stackpath.bootstrapcdn.com/bootstrap/4.3.1/js/bootstrap.bundle.min.js"></script>
    <title>How to integrate stripe payment gateway in php - Coding Birds Online</title>
    <style> .required { color: red; font-weight: bold }</style>
</head>
<body>
<div class="container">
    <div class="row">
        <div class="col-sm-9 col-md-7 col-lg-5 mx-auto">
            <div class="card card-signin my-5">
                <div class="card-body">
                    <center>
                        <img src="https://codingbirdsonline.com/wp-content/uploads/2020/01/cropped-coding-birds-online-favicon-180x180.png" width="50"/>
                    </center> <br/>
                    <h5 class="card-title text-center">Join This College Event</h5>
                    <form action="checkout.php" method="post">
                        <div class="form-group">
                            <label for="name">Name <span class="required">*</span></label>
                            <input type="text" name="name" class="form-control" placeholder="Name" required/>
                        </div>
                        <div class="form-group">
                            <label for="email">Email <span class="required">*</span></label>
                            <input type="email" name="email" id="email" class="form-control" placeholder="Email" required/>
                        </div>
                        <div class="form-group">
                            <label for="contact">Contact <span class="required">*</span></label>
                            <input type="text" name="contact" id="contact" class="form-control" placeholder="Contact" maxlength="10" required/>
                        </div>
                        <div class="form-group">
                            <label for="amount">Fee Amount <span class="required">*</span></label>
                            <input type="text" name="amount" id="amount" class="form-control" placeholder="Amount" value="100" readonly required/>
                        </div>
                        <button type="submit" name="payNowBtn" class="btn btn-lg btn-primary btn-block">Pay Now <span class="fa fa-angle-right"></span></button>
                    </form>
                </div>
            </div>
        </div>
    </div>
</div>
</body>
</html>

In the index.php file, we have the form action of checkout.php. This file contains the main logic of creating products and prices and creates payment links and redirects. Here is the code.

<?php
session_start();

require_once 'Database.php';
require_once "StripeHelper.php";
require_once "User.php";
/**
 * APP url/base url
 */
$appUrl = "http://localhost/projects/codingbirds_/integrate-stripe-payment-gateway-in-php/";

$productPrice = 100; // calculate as per logic //

$database = new Database();
/**
 * When registration form submitted
 */
if (isset($_POST['payNowBtn'])){
    $user = new User();
    $data = $_POST;
    $data['amount'] = $productPrice;
    $user = $user->registerUser($database->connection, $_POST);
    $_SESSION['user_id'] = $database->connection->insert_id;
}

$stripeHelper = new StripeHelper();
$stripe = $stripeHelper->stripeClient;
/**
 * Create product
 */
$product = $stripeHelper->createProducts();
/**
 * Create price for product
 */
$price = $stripeHelper->createProductPrice($product, $productPrice);
/**
 * create checkout session and payment link
 */
$stripeSession = $stripe->checkout->sessions->create(
    array(
        'success_url' => $appUrl . 'success.php?session_id={CHECKOUT_SESSION_ID}',
        'cancel_url' => $appUrl . 'failed.php',
        'payment_method_types' => array('card'),
        'mode' => 'payment',
        'line_items' => array(
            array(
                'price' => $price->id,
                'quantity' => 1,
            )
        )
    )
);
header("Location: " . $stripeSession->url);

In this file, we have included other helper class files Database.php, StripeHelper.php & User.php. Here is the code of these files.

Database.php

<?php
include_once "constants.php";
class Database
{
    /**
     * @var mysqli
     */
    public $connection;

    public function __construct()
    {
        $this->connection = new mysqli(DB_HOST,DB_USERNAME,DB_PASSWORD,DB_NAME);
        if (!$this->connection) {
            die("Error in database connection". $this->connection->connect_error);
        }
    }
}

constants.php file code is

<?php
/**
 * Database configuration
 */
define('DB_HOST', 'localhost');
define('DB_USERNAME', 'root');
define('DB_PASSWORD', '');
define('DB_NAME', 'codingbirds');

/**
 * Stripe API configuration
 */
define('STRIPE_API_SECRET_KEY', 'xxxxxxxxxxx');

StripeHelper.php

<?php
require 'vendor/autoload.php';
include_once "constants.php";
class StripeHelper
{
    /**
     * @var \Stripe\StripeClient
     */
    public $stripeClient;

    public function __construct()
    {
        $this->stripeClient = new \Stripe\StripeClient(STRIPE_API_SECRET_KEY);
    }
    /**
     * Create product
     * @return \Stripe\Product
     * @throws \Stripe\Exception\ApiErrorException
     */
    public function createProducts()
    {
        return $this->stripeClient->products->create(array(
            'name' => 'Course 1',
            'description' => 'Lorem ipsum dolor sit amet, consectetur adipiscing elit, sed do eiusmod tempor incididunt ut labore et dolore magna aliqua. Ut enim ad minim veniam, quis nostrud exercitation ullamco laboris nisi ut aliquip ex ea commodo consequat.',
        ));
    }

    /**
     * Create price
     * @param $product
     * @param $productPrice
     * @return \Stripe\Price
     * @throws \Stripe\Exception\ApiErrorException
     */
    public function createProductPrice($product, $productPrice)
    {
        return $this->stripeClient->prices->create(array(
            'unit_amount' => $productPrice * 100,
            'currency' => 'INR',
            'product' => $product->id,
        ));
    }
    /**
     * Get session detail
     * @param $sessionId
     * @return \Stripe\Checkout\Session
     * @throws \Stripe\Exception\ApiErrorException
     */
    public function getSession($sessionId)
    {
        return $this->stripeClient->checkout->sessions->retrieve($sessionId);
    }
}

success.php

<?php
session_start();
require_once "Database.php";
require_once "StripeHelper.php";
require_once "User.php";

$stripeHelper = new StripeHelper();
if(isset($_SESSION['user_id'])){
    $user = new User();
    $database = new Database();
    $sessionId = $_GET['session_id'];
    $userId = $_SESSION['user_id'];
    $checkoutSession = $stripeHelper->getSession($sessionId);
    $user->updatePaymentStatus($database->connection, $checkoutSession->payment_intent, $userId);
}else{
    header("Location: index.php");
}

//echo '<pre>';
///print_r($checkoutSession);
?>
<!doctype html>
<html lang="en">
<head>
    <meta charset="UTF-8">
    <meta name="viewport" content="width=device-width, user-scalable=no, initial-scale=1.0, maximum-scale=1.0, minimum-scale=1.0">
    <meta http-equiv="X-UA-Compatible" content="ie=edge">
    <link rel="icon" href="https://codingbirdsonline.com/wp-content/uploads/2019/12/cropped-coding-birds-favicon-2-1-192x192.png" type="image/x-icon">
    <link rel="stylesheet" href="https://stackpath.bootstrapcdn.com/bootstrap/4.3.1/css/bootstrap.min.css">
    <link rel="stylesheet" href="https://use.fontawesome.com/releases/v5.8.2/css/all.css">
    <script src="https://ajax.googleapis.com/ajax/libs/jquery/3.4.1/jquery.min.js"></script>
    <script type="text/javascript" src="https://stackpath.bootstrapcdn.com/bootstrap/4.3.1/js/bootstrap.bundle.min.js"></script>
    <title>Success | How to integrate stripe payment gateway in php - Coding Birds Online</title>
</head>
<body>
<div class="container">
    <div class="row">
        <div class="col-sm-9 col-md-7 col-lg-5 mx-auto">
            <div class="card card-signin my-5">
                <div class="card-body" style="outline: 2px solid #23e323">
                    <h5 class="card-title text-center">Payment success</h5>
                    <p>Transaction ID: <?php echo $checkoutSession->payment_intent; ?> </p>
                </div>
            </div>
        </div>
    </div>
</div>
</body>
</html>

failed.php

<!doctype html>
<html lang="en">
<head>
    <meta charset="UTF-8">
    <meta name="viewport" content="width=device-width, user-scalable=no, initial-scale=1.0, maximum-scale=1.0, minimum-scale=1.0">
    <meta http-equiv="X-UA-Compatible" content="ie=edge">
    <link rel="icon" href="https://codingbirdsonline.com/wp-content/uploads/2019/12/cropped-coding-birds-favicon-2-1-192x192.png" type="image/x-icon">
    <link rel="stylesheet" href="https://stackpath.bootstrapcdn.com/bootstrap/4.3.1/css/bootstrap.min.css">
    <link rel="stylesheet" href="https://use.fontawesome.com/releases/v5.8.2/css/all.css">
    <script src="https://ajax.googleapis.com/ajax/libs/jquery/3.4.1/jquery.min.js"></script>
    <script type="text/javascript" src="https://stackpath.bootstrapcdn.com/bootstrap/4.3.1/js/bootstrap.bundle.min.js"></script>
    <title>Failed | How to integrate stripe payment gateway in php - Coding Birds Online</title>
</head>
<body>
    <div class="container">
        <div class="row">
            <div class="col-sm-9 col-md-7 col-lg-5 mx-auto">
                <div class="card card-signin my-5">
                    <div class="card-body" style="outline: 2px solid red">
                        <h5 class="card-title text-center">Payment failed</h5>
                    </div>
                </div>
                <a href="./index.php" class="btn btn-primary">Try again </a>
            </div>
        </div>
    </div>
</body>
</html>

User.php

<?php
class User
{
    /**
     * Register the user
     * @param $connection
     * @param $data
     * @return mixed
     */
    public function registerUser($connection, $data)
    {
        $date = date('Y-m-d H:i:s');
        $query = "INSERT INTO bird_stripe_payments SET name ='{$data['name']}',email='{$data['email']}',
        contact='{$data['contact']}',amount='{$data['amount']}', created_at='{$date}' ";
        $result = $connection->query($query) or die("Error in query".$connection->error);
        return $result;
    }

    /**
     * Update the payment status
     * @param $connection
     * @param $txnId
     * @param $userId
     * @return mixed
     */
    public function updatePaymentStatus($connection, $txnId, $userId)
    {
        $query = "UPDATE bird_stripe_payments SET payment_status='Completed', payment_intent='$txnId' WHERE id='$userId' ";
        $result = $connection->query($query) or die("Error in query".$connection->error);
        return $result;
    }
}

After creating these files & code if you run your project then it will look something like this.

integrate-stripe-payment-gateway-in-files-demo-page-coding-birds-online

After filling in the details click on pay now you will be redirected to the 3rd party stripe page which will handle the payment come back again to our success or fail callback pages.

integrate-stripe-payment-gateway-in-files-demo-stripe-payment-page-coding-birds-online

This is the payment detail page by stripe. This is under test mode you can enter any email name and proceed. Stripe does provide some test details to test the payment. You can try these.

yourtest@gmail.com 4242 4242 4242 4242 02/25123Ankit Prajapati

After successful payment, you will get redirected to the success.php screen

integrate-stripe-payment-gateway-success-page-coding-birds-online

Yes, we can customize the success page according to the needs and requirements.

If payment failed due to any reason or you canceled the payment then you will be redirected to the failed.php file.

integrate-stripe-payment-gateway-failed-page-coding-birds-online

Meanwhile, If you notice the checkout.php we create an entry to our database table with user details and payment status pending. After successful payment, we update the payment status to be completed to keep our record updated.

db-tables-coding-birds-online

Last but not least you can check all your actual payment transactions and history to your stripe dashboard.

stripe-dashboard-coding-birds-online

Source Code & Demo

You can download the full 100% working source code from here. You check this demo also.

Conclusion

I hope you learned explained above, If you have any suggestions are appreciated. And if you have any errors comment here, I will help. You can download the full 100% working source code from here.

Ok, Thanks for reading this article, see you in the next post. If this code works for you, please leave a comment so that others can find it useful which gives motivation to me to create such content.

Hi developers, welcome you all in another article on how to make the Razorpay payment gateway setup in CodeIgniter. I hope, you must have integrated other payment gateways like PayUmoney, Paytm payment gateway, etc.

If you didn’t don’t worry follow the steps as I have given you, you will able to achieve without any errors.

Razorpay is the most popular payment gateway in India. Razorpay provides clean, fast,
secure payments services with hassle-free integration with developer-friendly APIs.

So without wasting the time, lets come directly for which you came.
I am expecting you that, you all are up with your Razorpay account, and you got your RAZOR_KEY, RAZOR_SECRET_KEY.

Check this also Login with Google account: using JavaScript OAuth Library

What do we need to Razorpay payment gateway setup?

  • A CodeIgniter project
  • A Controller of which index function will load a form view
  • If you want to save information to the database then you create a model also.
  • We need a form view file
  • Last but not least, follow the steps carefully, don’t worry if your code does not work. I will provide the source code also.

Step 1: Get the keys and define them in the project

Open the “application/config/constants.php” file, at the end of the fine define constants:

  <?php
    define('RAZOR_KEY_ID', 'XXXXXXXXXX');
    define('RAZOR_KEY_SECRET', 'XXXXXXXXXX');
  ?>

Step 2: Create a controller “Register.php”

Got to “application/controllers/” create a PHP file named “Register.php” and paste the following code.

<?php
defined('BASEPATH') OR exit('No direct script access allowed');
require_once(APPPATH."libraries/razorpay/razorpay-php/Razorpay.php");

use Razorpay\Api\Api;
use Razorpay\Api\Errors\SignatureVerificationError;

class Register extends CI_Controller {
	/**
	 * This function loads the registration form
	 */
	public function index()
	{
		$this->load->view('register');
	}

	/**
	 * This function creates order and loads the payment methods
	 */
	public function pay()
	{
		$api = new Api(RAZOR_KEY, RAZOR_SECRET_KEY);
		/**
		 * You can calculate payment amount as per your logic
		 * Always set the amount from backend for security reasons
		 */
		$_SESSION['payable_amount'] = 10;

		$razorpayOrder = $api->order->create(array(
			'receipt'         => rand(),
			'amount'          => $_SESSION['payable_amount'] * 100, // 2000 rupees in paise
			'currency'        => 'INR',
			'payment_capture' => 1 // auto capture
		));


		$amount = $razorpayOrder['amount'];

		$razorpayOrderId = $razorpayOrder['id'];

		$_SESSION['razorpay_order_id'] = $razorpayOrderId;

		$data = $this->prepareData($amount,$razorpayOrderId);

		$this->load->view('rezorpay',array('data' => $data));
	}

	/**
	 * This function verifies the payment,after successful payment
	 */
	public function verify()
	{
		$success = true;
		$error = "payment_failed";
		if (empty($_POST['razorpay_payment_id']) === false) {
			$api = new Api(RAZOR_KEY, RAZOR_SECRET_KEY);
		try {
				$attributes = array(
					'razorpay_order_id' => $_SESSION['razorpay_order_id'],
					'razorpay_payment_id' => $_POST['razorpay_payment_id'],
					'razorpay_signature' => $_POST['razorpay_signature']
				);
				$api->utility->verifyPaymentSignature($attributes);
			} catch(SignatureVerificationError $e) {
				$success = false;
				$error = 'Razorpay_Error : ' . $e->getMessage();
			}
		}
		if ($success === true) {
			/**
			 * Call this function from where ever you want
			 * to save save data before of after the payment
			 */
			$this->setRegistrationData();

			redirect(base_url().'register/success');
		}
		else {
			redirect(base_url().'register/paymentFailed');
		}
	}

	/**
	 * This function preprares payment parameters
	 * @param $amount
	 * @param $razorpayOrderId
	 * @return array
	 */
	public function prepareData($amount,$razorpayOrderId)
	{
		$data = array(
			"key" => RAZOR_KEY,
			"amount" => $amount,
			"name" => "Coding Birds Online",
			"description" => "Learn To Code",
			"image" => "https://demo.codingbirdsonline.com/website/img/coding-birds-online/coding-birds-online-favicon.png",
			"prefill" => array(
				"name"  => $this->input->post('name'),
				"email"  => $this->input->post('email'),
				"contact" => $this->input->post('contact'),
			),
			"notes"  => array(
				"address"  => "Hello World",
				"merchant_order_id" => rand(),
			),
			"theme"  => array(
				"color"  => "#F37254"
			),
			"order_id" => $razorpayOrderId,
		);
		return $data;
	}

	/**
	 * This function saves your form data to session,
	 * After successfull payment you can save it to database
	 */
	public function setRegistrationData()
	{
		$name = $this->input->post('name');
		$email = $this->input->post('email');
		$contact = $this->input->post('contact');
		$amount = $_SESSION['payable_amount'];

		$registrationData = array(
			'order_id' => $_SESSION['razorpay_order_id'],
			'name' => $name,
			'email' => $email,
			'contact' => $contact,
			'amount' => $amount,
		);
		// save this to database

	}

	/**
	 * This is a function called when payment successfull,
	 * and shows the success message
	 */
	public function success()
	{
		$this->load->view('success');
	}
	/**
	 * This is a function called when payment failed,
	 * and shows the error message
	 */
	public function paymentFailed()
	{
		$this->load->view('error');
	}	
}

Step 2: Create view files “registration-form.php” and “rezorpay.php”

Got to “application/views/” create two files named “registration-form.php” and “rezorpay.php” and paste the following code respectively.

registration-form.php

<!doctype html>
<html lang="en">
<head><meta http-equiv="Content-Type" content="text/html; charset=utf-8">
    <meta name="viewport" content="width=device-width, user-scalable=no, initial-scale=1.0, maximum-scale=1.0, minimum-scale=1.0">
    <meta http-equiv="X-UA-Compatible" content="ie=edge">
    <link rel="icon" href="https://codingbirdsonline.com/wp-content/uploads/2019/12/cropped-coding-birds-favicon-2-1-192x192.png" type="image/x-icon">
    <link rel="stylesheet" href="https://stackpath.bootstrapcdn.com/bootstrap/4.3.1/css/bootstrap.min.css">
    <link rel="stylesheet" href="https://use.fontawesome.com/releases/v5.8.2/css/all.css">
    <script type="text/javascript" src="https://cdnjs.cloudflare.com/ajax/libs/jquery/3.4.1/jquery.slim.min.js"></script>
    <script type="text/javascript" src="https://stackpath.bootstrapcdn.com/bootstrap/4.3.1/js/bootstrap.bundle.min.js"></script>
    <title>Razorpay Payment Gateway: How to integration Razorpay payment gatway in CodeIgniter,PHP | CodingBirdsOnline</title>
</head>
<body>
<div class="container">
    <div class="row">
        <div class="col-sm-9 col-md-7 col-lg-5 mx-auto">
            <div class="card card-signin my-5">
                <div class="card-body">
                    <h5 class="card-title text-center">Razor Pay Integration in CodeIgniter</h5>
                    <form action="<?php echo base_url().'register/pay'; ?>" method="post" class="form-signin">
                        <div class="form-label-group">
                            <label for="name">Name <span style="color: #FF0000">*</span></label>
                            <input type="text" name="name" id="name" class="form-control" placeholder="Name"  required >
                        </div> <br/>
                        <div class="form-label-group">
                            <label for="email">Email <span style="color: #FF0000">*</span></label>
                            <input type="text" name="email" id="email" class="form-control" placeholder="Email address" required>
                        </div> <br/>
                        <label for="contact">Contact <span style="color: #FF0000">*</span></label>
                        <div class="form-label-group">
                            <input type="text" id="contact" name="contact" class="form-control" placeholder="Contact" required>
                        </div><br/>

					<label for="subject">Amount <span style="color: #FF0000">*</span></label>
                        <div class="form-label-group">
                            <input type="text" id="amount" name="amount" value="10" readonly class="form-control" placeholder="Amount" required>
                        </div><br/>
                       <br/>
                        <button type="submit" name="sendMailBtn" class="btn btn-lg btn-primary btn-block text-uppercase" >Pay Now</button>
                    </form>
                </div>
            </div>
        </div>
    </div>
</div>
</body>
</html>

rezorpay.php

<button id="rzp-button1" style="display:none;">Pay with Razorpay</button>
<script src="https://checkout.razorpay.com/v1/checkout.js"></script>
 <script type="text/javascript" src="https://cdnjs.cloudflare.com/ajax/libs/jquery/3.4.1/jquery.slim.min.js"></script>
<form name='razorpayform' action="<?php echo base_url().'register/verify';?>" method="POST">
    <input type="hidden" name="razorpay_payment_id" id="razorpay_payment_id">
    <input type="hidden" name="razorpay_signature"  id="razorpay_signature" >
</form>
<script>
// Checkout details as a json
var options = <?php echo json_encode($data);?>;

/**
 * The entire list of Checkout fields is available at
 * https://docs.razorpay.com/docs/checkout-form#checkout-fields
 */
options.handler = function (response){
    document.getElementById('razorpay_payment_id').value = response.razorpay_payment_id;
    document.getElementById('razorpay_signature').value = response.razorpay_signature;
    document.razorpayform.submit();
};

// Boolean whether to show image inside a white frame. (default: true)
options.theme.image_padding = false;

options.modal = {
    ondismiss: function() {
        console.log("This code runs when the popup is closed");
    },
    // Boolean indicating whether pressing escape key 
    // should close the checkout form. (default: true)
    escape: true,
    // Boolean indicating whether clicking translucent blank
    // space outside checkout form should close the form. (default: false)
    backdropclose: false
};

var rzp = new Razorpay(options);

$(document).ready(function(){
	$("#rzp-button1").click();
	 rzp.open();
    e.preventDefault();
});
</script>

Step 3: Run the code

Now the final step is to run the code. For this navigate to your project folder via localhost. If you see the following screen view then congratulations.

Razorpay payment gateway setup

This is just a dummy payment amount, the actual payment you will calculate by your logic. Anyways fill the form and submit it. Now you will a payment screen itself provided by Razorpay and defined its view in the “Application/views/razorpay.php” file.

Razorpay payment gateway setup

Now, this is a dummy payment view, you can make payment by any method you want. In my example, I just selected net banking, click next

Razorpay payment gateway setup

As I already told you that this is a fake payment, so just click on the success button. After that, you will be redirected to a payment success page.

Razorpay payment gateway setup

Source Code & Demo

You can download the full 100% working source code from here.

Conclusion

I hope you learned and understood the Razorpay payment gateway setup explained above, If you have any suggestions, are appreciated. And if you have any errors comment here, I will help. You can download the full 100% working source code from here.

Thanks for reading this article, see you in the next post. If this code works for you, please leave a comment so that others can find code useful.

Happy Coding 🙂

Hi, If you are looking for the PHP script to learn how to send email with attachment in PHP without going to spam then you are in the right place. I know you searched a lot on Google to find source code but every code sends that to spam, not in the inbox. Check our demo to confirm.

Here I am going to give a PHP script by which your email with an attachment will always go to inbox. Sending an email with attachment is the most common task in web development.

When you are applying for a job or submitting any application, you often might be noticed that they accept a file to upload. It may be anything like your CV or resume, profile picture or any other document.

Sending details to email is sometimes good in terms of saving space on our server. Since we are not storing the details on our database or attachment to our server folders.

How to do that?

Here we will use a simple HTML form accepting basic details like name, email, subject, message, and an attachment. The attachment has a validation that only PDF, DOC, JPG, JPEG, & PNG files are allowed to upload. In the previous tutorial, we learned about how to send email in PHP step by step but here we will do the same with attachment.

So what are we waiting for? Let’s start. Check the files and folder we are going to create.

how-to-send-email-with-attachment-in-php-coding-birds-online-file-and-folders
  • index.php is the main file which is a simple HTML form as I told above.
  • email-script.php is the script file that sends an email with an attachment.
  • validation-script.js is a javaScript validation file.
  • uploads folder saves the attachment to send emails and deletes later.

Now we should create these files. I am giving you just code block here. Make sure you put these CDN in to head off your index.php to work your code.

   <link rel="stylesheet" href="https://stackpath.bootstrapcdn.com/bootstrap/4.3.1/css/bootstrap.min.css">
    <script src="https://ajax.googleapis.com/ajax/libs/jquery/3.4.1/jquery.min.js"></script>

And include this javaScript validation file also before closing to the body tag.

<script src="validation-script.js"></script>

index.php

    <div class="container">
        <div class="row">
            <div class="col-lg-8 posts-list">
                <div class="card card-signin my-5">
                    <div class="card-body">
                        <center><img src="../website/img/coding-birds-online/coding-birds-online-favicon.png" width="70"></center>
                        <h5 class="card-title text-center">Send email with attachment in PHP</h5>
                        <form method="post" action="email-script.php" enctype="multipart/form-data" id="emailForm">
                            <div class="form-group">
                                <input type="text" name="name" id="name" class="form-control" placeholder="Name" >
                                <div id="nameError" style="color: red;font-size: 14px;display: none">nameError</div>
                            </div>
                            <div class="form-group">
                                <input type="email" name="email" id="email" class="form-control" placeholder="Email address" >
                                <div id="emailError" style="color: red;font-size: 14px;display: none">emailError</div>
                            </div>
                            <div class="form-group">
                                <input type="text" name="subject" id="subject" class="form-control"  placeholder="Subject" >
                                <div id="subjectError" style="color: red;font-size: 14px;display: none">subjectError</div>
                            </div>
                            <div class="form-group">
                                <textarea name="message" id="message" class="form-control" placeholder="Write your message here"></textarea>
                                <div id="messageError" style="color: red;font-size: 14px;display: none">messageError</div>
                            </div>
                            <div class="form-group">
                                <input type="file" name="attachment" id="attachment" class="form-control">
                                <div id="attachmentError" style="color: red;font-size: 14px;display: none">attachmentError</div>
                            </div>
                            <div class="submit">
                                <input type="submit" name="submit" onclick="return validateEmailSendForm();" class="btn btn-success" value="SUBMIT">
                            </div>
                        </form>
                    </div>
                </div>
            </div>
        </div>
    </div>

If you notice this form uses an action to email-script.php this file. Create this file also.

email-script.php

<?php

if(isset($_POST['submit'])){
    // Get the submitted form data
    $email = $_POST['email'];
    $name = $_POST['name'];
    $subject = $_POST['subject'];
    $message = $_POST['message'];
    $uploadStatus = 1;

    // Upload attachment file
    if(!empty($_FILES["attachment"]["name"])){

        // File path config
        $targetDir = "uploads/";
        $fileName = basename($_FILES["attachment"]["name"]);
        $targetFilePath = $targetDir . $fileName;
        $fileType = pathinfo($targetFilePath,PATHINFO_EXTENSION);

        // Allow certain file formats
        $allowTypes = array('pdf', 'doc', 'docx', 'jpg', 'png', 'jpeg');
        if(in_array($fileType, $allowTypes)){
            // Upload file to the server
            if(move_uploaded_file($_FILES["attachment"]["tmp_name"], $targetFilePath)){
                $uploadedFile = $targetFilePath;
            }else{
                $uploadStatus = 0;
                $statusMsg = "Sorry, there was an error uploading your file.";
            }
        }else{
            $uploadStatus = 0;
            $statusMsg = 'Sorry, only PDF, DOC, JPG, JPEG, & PNG files are allowed to upload.';
        }
    }

    if($uploadStatus == 1){
        // Recipient
        $toEmail = $email;
        // Sender
        $from = 'info@codingbirdsonline.com';
        $fromName = 'Coding Birds Online';
        // Subject
        $emailSubject = 'Email attachment request Submitted by '.$name;
        // Message
        $htmlContent = '<h2>Contact Request Submitted</h2>
                <p><b>Name:</b> '.$name.'</p>
                <p><b>Email:</b> '.$email.'</p>
                <p><b>Subject:</b> '.$subject.'</p>
                <p><b>Message:</b><br/>'.$message.'</p>';

        // Header for sender info
        $headers = "From: $fromName"." <".$from.">";

        if(!empty($uploadedFile) && file_exists($uploadedFile)){
            // Boundary
            $semi_rand = md5(time());
            $mime_boundary = "==Multipart_Boundary_x{$semi_rand}x";
            // Headers for attachment
            $headers .= "\nMIME-Version: 1.0\n" . "Content-Type: multipart/mixed;\n" . " boundary=\"{$mime_boundary}\"";
            // Multipart boundary
            $message = "--{$mime_boundary}\n" . "Content-Type: text/html; charset=\"UTF-8\"\n" .
                "Content-Transfer-Encoding: 7bit\n\n" . $htmlContent . "\n\n";
            // Preparing attachment
            if(is_file($uploadedFile)){
                $message .= "--{$mime_boundary}\n";
                $fp =    @fopen($uploadedFile,"rb");
                $data =  @fread($fp,filesize($uploadedFile));
                @fclose($fp);
                $data = chunk_split(base64_encode($data));
                $message .= "Content-Type: application/octet-stream; name=\"".basename($uploadedFile)."\"\n" .
                    "Content-Description: ".basename($uploadedFile)."\n" .
                    "Content-Disposition: attachment;\n" . " filename=\"".basename($uploadedFile)."\"; size=".filesize($uploadedFile).";\n" .
                    "Content-Transfer-Encoding: base64\n\n" . $data . "\n\n";
            }

            $message .= "--{$mime_boundary}--";
            $returnpath = "-f" . $email;
            // Send email
            $mail = mail($toEmail, $emailSubject, $message, $headers, $returnpath);
            // Delete attachment file from the server
            @unlink($uploadedFile);
        }else{
            // Set content-type header for sending HTML email
            $headers .= "\r\n". "MIME-Version: 1.0";
            $headers .= "\r\n". "Content-type:text/html;charset=UTF-8";
            // Send email
            $mail = mail($toEmail, $emailSubject, $htmlContent, $headers);
        }

        // If mail sent
        if($mail){
            $statusMsg = 'Your email attachment request has been submitted successfully !';
        }else{
            $statusMsg = 'Your request submission failed, please try again.';
        }
    }
    echo '<script>alert("'.$statusMsg.'");window.location.href="./";</script>';
}
?>

validation-script.js

function validateEmailSendForm() {
   var name = $("#name").val();
   var email = $("#email").val();
   var subject = $("#subject").val();
   var message = $("#message").val();
   var attachment = $("#attachment").val();

   if (name == ""){
       $("#nameError").show();
       $("#nameError").html("Please enter your name");
       $("#nameError").fadeOut(4000);
       $("#name").focus();
       return false;
   }else  if (email == ""){
       $("#emailError").show();
       $("#emailError").html("Please enter your email");
       $("#emailError").fadeOut(4000);
       $("#email").focus();
       return false;
   }else  if (!validateEmail(email)){
       $("#emailError").show();
       $("#emailError").html("Please enter valid email");
       $("#emailError").fadeOut(4000);
       $("#email").focus();
       return false;
   }else  if (subject == ""){
       $("#subjectError").show();
       $("#subjectError").html("Please enter subject");
       $("#subjectError").fadeOut(4000);
       $("#subject").focus();
       return false;
   }else if (message == ""){
       $("#messageError").show();
       $("#messageError").html("Please enter some message");
       $("#messageError").fadeOut(4000);
       $("#message").focus();
       return false;
   }else if (attachment == ""){
       $("#attachmentError").show();
       $("#attachmentError").html("Please select a attachment");
       $("#attachmentError").fadeOut(4000);
       $("#attachment").focus();
       return false;
   }else{
       return true;
   }

    function validateEmail(inputText) {
        var mailformat = /^\w+([\.-]?\w+)*@\w+([\.-]?\w+)*(\.\w{2,3})+$/;
        if(inputText.match(mailformat)) {
            return true;
        } else{
            return false;
        }
    }
}

Run the code!

Now it is time to run and test our code. If you did everything step by step then you will not face any errors and you will get output something like this.

how-to-send-email-with-attachment-in-php-coding-birds-online-output

This form is validated properly like empty fields, valid email and attachment file accepted. When you fill that form and hit the submit button then you will get the alert message of success or errors.

Check this also How to make a dynamic pie chart in PHP in 2 steps.

Attention !!! It may take 1 or 2 minutes to receive email with attachment so please have patience. But I am sure you will receive in primary inbox not to spam.

how-to-send-email-with-attachment-in-php-coding-birds-online-email-sent-output2
how-to-send-email-with-attachment-in-php-coding-birds-online-email-sent-output3

Source Code & Demo

You can download the full 100% working source code from here. You check this demo also.

Conclusion

I hope you learned explained above, If you have any suggestions, are appreciated. And if you have any errors comment here. You can download the full 100% working source code from here.

Ok, Thanks for reading this article, see you in the next post.

Happy Coding 🙂

Making users active inactive is the most important and common feature in web applications and websites. In this tutorial, we are going to learn how to make active inactive users in PHP using jQuery AJAX without page refresh. You check this demo also. You can implement the same code with CodeIgniter as CI follows the MVC pattern.

Why we need it?

Suppose you have a web application in which employees doing registration and then after login and performs their tasks. Now if any user is doing some inappropriate activities then you disable his login account.

consider this example as you have a list of users or employees and you want to disable his account so that he failed to login. To do this just need to press a thumb down button and his status in the database table will be 0. And In the login query, you make check the only those people can log in to the system whose status is 1.

Check these posts also

So what are you waiting for? let’s get started. Check these files and folder structure.

active-inactive-users-in-php-using-jquery-ajax-coding-birds-online-file-and-folder-structure
  • index.php is the main file on which everything is to be performed
  • script.php is a logic file contains the code to perform active inactive operations
  • script.php uses the config.php is the connection file to the database
  • active-inactive-script.js is the javaScript file in which we wrote AJAX to avoid page refresh
  • bird_active_inactive_users.sql is the SQL file which is a database table which the following structure.
active-inactive-users-in-php-using-jquery-ajax-coding-birds-online-table-structure

Don’t worry I will provide the full 100% working source code so that you can download it and implement it to your machine. Let’s create these files. Make sure you use bootstrap and jQuery. Bootstrap is just for styling and optional but jQuery is mandatory since we are making AJAX request.

   <link rel="stylesheet" href="https://stackpath.bootstrapcdn.com/bootstrap/4.3.1/css/bootstrap.min.css">
    <script src="https://ajax.googleapis.com/ajax/libs/jquery/3.4.1/jquery.min.js"></script>

And include this custom javaScript AJAX request file to the just below to jQuery. Here I am using version 3.4 of jQuery CDN. Here we are using javaScript and jQuery to enhance user experience.

You can learn more about JavaScript functions from this amazing article.

<script src="active-inactive-script.js"></script>

index.php

    <div class="container">
        <div class="row">
            <div class="col-lg-8 posts-list">
                <div class="card card-signin my-5">
                    <div class="card-body">
                        <center><img src="../website/img/coding-birds-online/coding-birds-online-favicon.png" width="70"></center>
                        <h5 class="card-title text-center">Active Inactive users in PHP</h5>
                    </div>
                    <table id="exampleTable" class="table table-bordered" style="width: 100%">
                        <thead id="thead">
                        <tr style="background-color: #1573ff">
                            <th>Sr.No</th>
                            <th>Name</th>
                            <th>Email</th>
                            <th>Contact</th>
                            <th>Action</th>
                        </tr>
                        </thead>
                        <tbody id="tableBodyData">
                        </tbody>
                    </table>
                    </div>
            </div>
        </div>
   </div>

active-inactive-script.js

$(document).ready(function () {
   $.post("script.php",{key:"getAllUsers"},function (response) {
        $("#tableBodyData").html(response);
   })
});

function activeInactive(recordId,status) {
    var message = ((status == 0?" inactive ":" Active "));
    if (confirm("Are you sure to"+ message+ "the user")){
        $.post("script.php",{key:"activeInactive",status:status,recordId:recordId},function (response) {
            if (response == "success"){
                if (status == 0){
                    $('#activeBtn'+recordId).show();
                    $('#inactiveBtn'+recordId).hide();
                }else if (status == 1){
                    $('#inactiveBtn'+recordId).show();
                    $('#activeBtn'+recordId).hide();
                }
                alert("User is "+ message +"now");
            }
        });
    }
}

script.php

<?php
include "config.php";
if ($_POST['key'] == "getAllUsers") {
    $tableData = '';
    $sr = 1;
    $query = "SELECT * FROM bird_active_inactive_users";
    $result = $connection->query($query);
    if ($result->num_rows>0){
        while ($row = $result->fetch_object()){
            $buttonActive = (($row->status == 0)?'block':'none');
            $buttonInActive = (($row->status == 1)?'block':'none');
            $tableData .='<tr>
                <td>'.$sr.'</td>
                <td>'.$row->name.'</td>
                <td>'.$row->email.'</td>
                <td>'.$row->contact.'</td>
                <td><a href="javaScript:void(0)" title="Active" style="display:'.$buttonActive.'" id="activeBtn'.$row->id.'" onclick="activeInactive(\''.$row->id.'\',1);" class="btn btn-success btn-sm"> <i class="fa fa-thumbs-up"></i></a>
                <a href="javaScript:void(0)" title="In active" style="display:'.$buttonInActive.'" id="inactiveBtn'.$row->id.'" onclick="activeInactive(\''.$row->id.'\',0);" class="btn btn-danger btn-sm"> <i class="fa fa-thumbs-down"></i></a> </td>
            </tr>';
            $sr++;
        }
    }
    echo $tableData;
}

if ($_POST['key'] == "activeInactive"){
    $status = $_POST['status'];
    $recordId = $_POST['recordId'];
    $query = "UPDATE bird_active_inactive_users SET status='$status' WHERE id='$recordId'";
    $result = $connection->query($query);
    if ($result){
        echo "success";
    }
}

config.php

<?php
$connection = new mysqli("localhost","root","","codingbirds");
if (! $connection){
    die("Error in connection".$connection->connect_error);
}

Run the Code!

If you followed the steps and you are confident that everything is fine then its time to check the code. Then you will get the output something like this. Create the table and have some data otherwise you will get blank or you can import the same table as I will provide the source code.

active-inactive-users-in-php-using-jquery-ajax-coding-birds-online-output

The red button is to inactive the user and green is to make the user active. Here I haven’t created a login system. This tutorial is to demonstrate how to make active inactive users in PHP using jQuery AJAX.

Source Code & Demo

You can download the full 100% working source code from here. You check this demo also.

Conclusion

I hope you learned explained above, If you have any suggestions, are appreciated. And if you have any errors comment here. You can download the full 100% working source code from here.

Ok, Thanks for reading this article, see you in the next post.

Happy Coding 🙂

To hide email addresses or contact numbers partially is the most common thing in web application development. If you might have noticed on so many websites when you register by using your email id or contact number, then they shoot a verification code on your email or phone.

And you can’t see the full email address or contact. They make it partially hidden by using some stars *. You can check this demo also.

So If you are looking to do the same thing on PHP and looking for how to partially hide email address in PHP using AJAX then you are in the right place.

Check this post also on how to clone a specific folder from a git repository.

How to do?

Here I will use a simple form accepting email id. When you press the submit button you will get a partially hidden email without page refresh.

To do this I will use AJAX functionality so that we can achieve this without page refresh. So without wasting time lets make out hands dirty with code.

  • Create index.php file is the main file
  • Now create script.php file is the logic file to hide email address partially.

index.php

<!doctype html>
<html lang="en">
<head>
    <meta charset="UTF-8">
    <meta name="viewport" content="width=device-width, user-scalable=no, initial-scale=1.0, maximum-scale=1.0, minimum-scale=1.0">
    <meta http-equiv="X-UA-Compatible" content="ie=edge">
    <link rel="icon" href="https://codingbirdsonline.com/wp-content/uploads/2019/12/cropped-coding-birds-favicon-2-1-192x192.png" type="image/x-icon">
    <link rel="stylesheet" href="https://stackpath.bootstrapcdn.com/bootstrap/4.3.1/css/bootstrap.min.css">
    <script src="https://ajax.googleapis.com/ajax/libs/jquery/3.4.1/jquery.min.js"></script>
    <title>How to partially hide email address in PHP using AJAX - Coding Birds Online</title>
    <style>.required{color: #FF0000;}</style>
</head>
<body>
<div class="container">
    <div class="row">
        <div class="col-sm-9 col-md-7 col-lg-5 mx-auto">
            <div class="card card-signin my-5">
                <div class="card-body">
                    <center><img width="50" src="https://codingbirdsonline.com/wp-content/uploads/2019/12/cropped-coding-birds-favicon-2-1-192x192.png"></center>
                    <h5 class="card-title text-center">Partially hide email address in php </h5>
                    <form id="myForm">
                        <div class="form-label-group">
                            <label for="inputEmail">Email <span class="required">*</span></label>
                            <input type="text" name="email" id="email" class="form-control" placeholder="Enter email ">
                        </div><br/>
                        <div id="partiallyHiddenEmail"></div><br/>
                        <button type="submit" name="submitBtn" id="submitBtn" class="btn btn-md btn-primary btn-block text-uppercase" >Hide</button>
                    </form>
                </div>
            </div>
        </div>
    </div>
</div>

<script type="text/javascript">
   $("form#myForm").on("submit",function (e) {
       e.preventDefault();
      var email = $("#email").val();
      if (email == ""){
          alert("Please enter email");
          $("#email").focus();
      }else if (!validateEmail(email)){
          alert("Please enter valid email");
          $("#email").focus();
      } else {
          $.post("script.php",{key:"hideEmailAddress",email:email},function (response) {
            $("#partiallyHiddenEmail").html(response);
          });
      }
   });

   function validateEmail(inputText) {
       var mailformat = /^\w+([\.-]?\w+)*@\w+([\.-]?\w+)*(\.\w{2,3})+$/;
       if(inputText.match(mailformat)) {
           return true;
       } else{
           return false;
       }
   }
</script>
</body>
</html>

This file uses the AJAX call, which in turn calls the script.php file.

script.php

<?php

if ($_POST['key'] == "hideEmailAddress"){
    $email = $_POST['email'];
    $partiallyHiddenEmail = mask_email($email);
    echo $partiallyHiddenEmail;

}

/*
Here's the logic:

We want to show X numbers.
If length of STR is less than X, hide all.
Else replace the rest with *.

*/

function mask_email($email) {
    $mail_parts = explode("@", $email);
    $domain_parts = explode('.', $mail_parts[1]);

    $mail_parts[0] = mask($mail_parts[0], 2, 1); // show first 2 letters and last 1 letter
    $domain_parts[0] = mask($domain_parts[0], 2, 1); // same here
    $mail_parts[1] = implode('.', $domain_parts);

    return implode("@", $mail_parts);
}

function mask($str, $first, $last) {
    $len = strlen($str);
    $toShow = $first + $last;
    return substr($str, 0, $len <= $toShow ? 0 : $first).str_repeat("*", $len - ($len <= $toShow ? 0 : $toShow)).substr($str, $len - $last, $len <= $toShow ? 0 : $last);
}

Run the Code!

When you run the code you will get something like this. if you get any errors, don’t worry I will provide the full 100% working source code.

how-to-partially-hide-email-address-in-php-using-ajax-coding-birds-online-output-1

If you enter the email address cs.ankitprajapati@gmail.com, Of course, you can enter your own. You will get the following output.

how-to-partially-hide-email-address-in-php-using-ajax-coding-birds-online-output-2

Source Code & Demo

You can download the full 100% working source code from here. You check this demo also.

Conclusion

I hope you learned explained above, If you have any suggestions, are appreciated. And if you have any errors comment here. You can download the full 100% working source code from here.

Ok, Thanks for reading this article, see you in the next post.

Happy Coding 🙂